
Every homeowner dreams of a lush, green yard. But getting there requires more than just unrolling sod and watering it. Proper sod installation is essential if you want that fresh turf to take root, grow evenly, and thrive long-term. Unfortunately, several common mistakes can quickly turn that dream into a patchy, frustrating mess. Whether you’re handling the job yourself or hiring a crew, understanding what not to do is just as important as knowing what steps to take.
Here are five common sod installation mistakes that are easy to avoid once you know what to look out for.
1. Skipping Proper Soil Preparation
Laying sod on unprepared ground is one of the biggest reasons lawns fail to thrive. You need more than just a flat space—you need a foundation that encourages deep root growth.
Start by removing all existing grass and weeds. Then, test your soil’s pH and make adjustments as needed using compost or other soil conditioners. After that, till the area to loosen compacted soil, which helps roots penetrate deeply.
Finally, grade the surface so water runs away from structures and doesn’t pool in low spots. With proper soil prep, your sod installation gets a strong start.
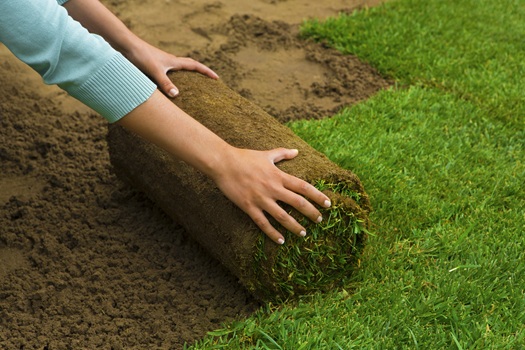
2. Leaving Gaps Between Sod Rolls
It might seem minor, but gaps between sod pieces can cause more trouble than expected. These open seams allow weeds to take hold, moisture to evaporate too quickly, and roots to dry out.
To avoid this issue, lay the sod tightly edge-to-edge, without overlaps or spaces. Press each piece firmly into place. Also, stagger the seams like bricks in a wall. This creates a stronger root network and a smoother, more polished appearance. With this technique, your sod installation will look seamless from day one.
3. Forgetting to Flatten the Sod
Once the sod is in place, it’s tempting to call the job finished—but don’t skip the roller. If you fail to flatten the turf, you risk trapping air pockets beneath the surface. These voids stop the roots from making solid contact with the soil, leading to dry spots or even dead patches.
After laying the final roll, go over the entire area with a lawn roller. This step helps press the sod firmly into the ground, encourages root-to-soil contact, and prevents bumps or dips. Good contact during sod installation makes all the difference in long-term health.
4. Watering Incorrectly in the Early Days
Watering is often misunderstood during sod installation. Some homeowners in Lexington SC overdo it and create soggy, oxygen-deprived soil. Others water too little, causing the turf to dry out before roots can take hold.
Ideally, water your sod within 30 minutes of laying it down. The soil beneath should be moist—not soaked—down to about 3 inches. Over the next two weeks, keep the sod consistently damp, especially during hot or windy days. Reduce the frequency slightly as roots begin to grow deeper.
Also, avoid watering at night to prevent fungal issues. Early morning is the best time to hydrate your new lawn without overdoing it.
5. Mowing Too Soon After Sod Installation
 sod services in Lexington SC
Mowing at the wrong time can be a costly mistake. If you mow too early, the sod might not be anchored well enough and could lift or tear, undoing days of progress.
Wait at least two to three weeks before mowing your newly installed turf. Test it first by gently tugging on a corner. If it resists and holds firm, it’s likely rooted well enough. When mowing for the first time, set your mower to its highest setting. Cutting too short can shock the grass and weaken it just when it needs strength the most.
Taking your time with this final step gives your sod installation a smoother transition into a strong, permanent lawn.
6. Hiring the wrong landscape company
7. DIY Sod Installation
Additional Tips for a Successful Sod Installation
Aside from avoiding mistakes, a few proactive choices can make your lawn installation much easier.
- Pick the right sod type for your climate and sun exposure
- Install sod quickly after delivery so it stays fresh
- Limit foot traffic for the first month to prevent disruption
- Apply fertiliser only after the sod is rooted and healthy
The first few weeks are the most critical, but with attention to timing, technique, and consistency, your efforts will pay off with a full, vibrant lawn.
Like our Facebook page now for more information.
Patriot Landscaping, LLC.
Lexington, SC 29071
(803) 319-8030
https://patriotlandscaping.us
Areas Served: Lexington SC, West Columbia SC, Chapin SC, Prosperity SC, Lake Murray SC, Gilbert SC, Cayce SC, Red Bank SC


No comments:
Post a Comment